It’s been a long time updating the blog. Here is a new post for those who need to boot their system from a USB device. This is an useful technique in case of booting a netbook or if there is no resource to insert a CD/DVD. First thing you need to do is preparing a bootable USB.
How to make a bootable USB device:
There are many tools like “windows 7 usb/dvd download tool” and “gburner” available to make an USB device into bootable.
Here i am going to use “windows 7 usb/dvd download tool” to make USB device bootable. you can download the tool from this link: windows 7 usb/dvd download tool
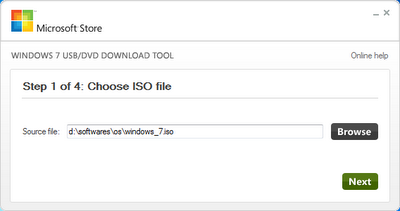
1. Download and install the tool and launch it after installation. Browse and select the image file of windows and click on “next”.
2. In the next step you need to select “USB device”.
3. Now, you need to select the target USB drive and click on “Begin copying”. This is what the final step in making the USB device bootable. In the 4th step you need to do nothing else than waiting until the process reaches to 100%.
4. When the USB drive is ready, connect it to the required system and start it. Now, you can see the system booting from the USB device.
NOTE: Make sure that the First bootable device is “USB HDD”.